How I Set Up My Jekyll Blog

Why I Chose Jekyll + GitHub Pages
When I decided to add a blog to my portfolio, I wanted something free, and easy to manage. Jekyll + GitHub Pages turned out to be the perfect combo because:
- It works directly with GitHub, meaning no extra hosting setup.
- I can write my blogs in Markdown, keeping things simple.
- It’s fully customizable to match my portfolio design.
- I was able to skip the process of installation of different things.
Steps I Followed to Set Up My Jekyll Blog
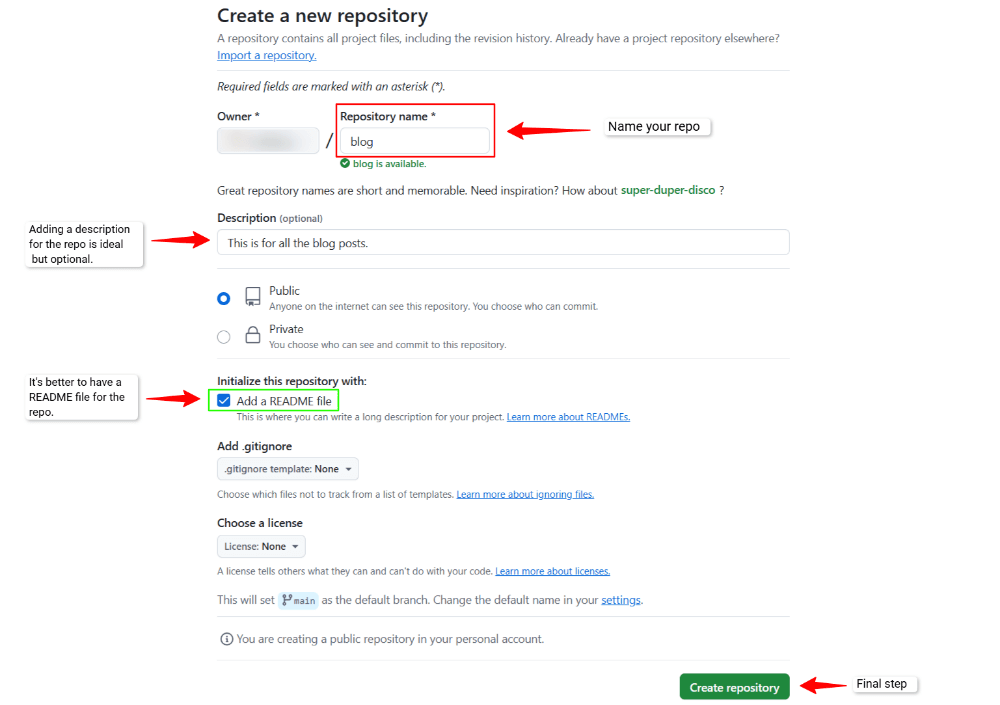
1. Created a New Repository
I created a new GitHub repository named blogs to store all my blog content.
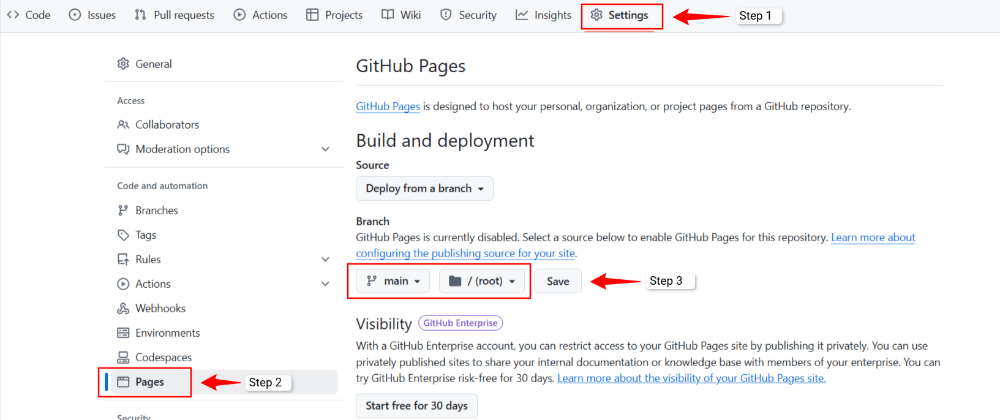
2. Enabled GitHub Pages
I went to Settings → Pages, set the branch to deploy, and GitHub Pages (which plays a major role) was activated.
3. Added Jekyll Setup
Instead of running Jekyll locally, I used GitHub’s built-in Jekyll processing by:
- Adding a
_config.ymlfile to configure the site. - Creating a
.mdfile, naming it by following the pattern YYYY-MM-DD-title-of-your-post.md. - Setting up a
_postsfolder to store my blog posts.
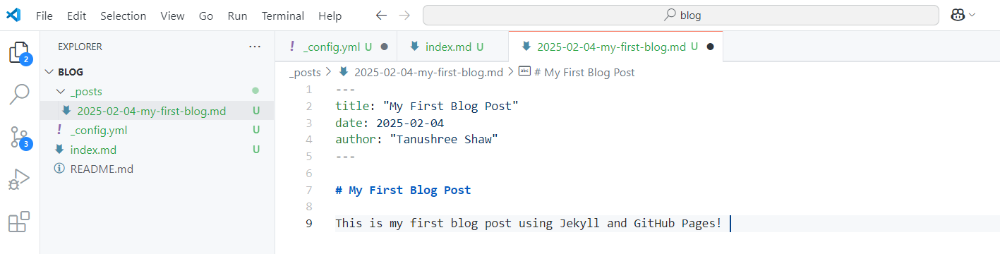
4. Wrote My First Blog in Markdown
Jekyll uses Markdown files for posts, so I created a .md file in _posts/ following this format:
_posts/2025-02-04-my-first-blog.md
Inside the file, I wrote:
---
title: "My First Blog Post"
date: 2025-02-04
author: "Tanushree Shaw"
---

# My First Blog Post

This is my first blog post using Jekyll and GitHub Pages!
5. Customized the Blog to Match My Portfolio
- Edited
_config.ymlto match my portfolio’s theme. - Updated the layout and styles to ensure consistency.
- Verified the changes by checking the GitHub Pages live link.
Challenges I Faced
- Figuring Out Which method should I follow: There are other methos that involve proper installations of some things, but for a new start Jekyll + GitHub Pages seemed the best choice.
- Figuring Out GitHub Actions: Jekyll on GitHub needs proper file structuring.
- Matching My Portfolio Design: Adjusting styles took some trial and error.
What’s Next?
Complete color customization to match my portfolio, so it blends well with my portfolio-site. Write more blog posts on tech topics and my journey. Improve SEO to help my blog rank better.
That’s how I set up my Jekyll blog directly from GitHub! If you’re doing the same, just experiment and tweak things as you go.